MS Word
How to Compare Two Versions of a MS Word Document (with Screenshots)
In this tutorial we show how to compare two versions of the same Word document so we can see what changes were made to each document. After comparing the documents, Word shows the differences with revision marks.
Knowing how to compare documents can be very useful, for example, when reviewing documents submitted by different writers. Quite often people do not put on Track Changes or forget to do so. In this case, you can compare the documents and see which parts of the document are different.
If you have two Word documents and want to see the differences between them, use the Compare feature in Word.
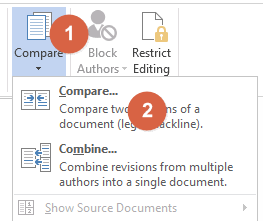
The Compare feature in the Review tab in MS Word
You can also merge two versions in the same document. However, be careful. Make sure you merge A into B, not B into A.
How to Compare Two Versions of a Word Document
You can compare and merge two versions of a document and see how they differ.
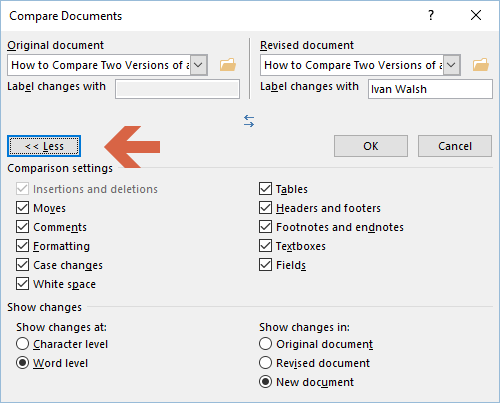
 The Comparison Settings on the Compare Documents dialog box
Do either of the following:
- Open the first document that you want to compare.
- On the Review menu, point to Compare, then Compare from the drop-down menu.

- In the Original document list, select the original document.

- In the Revised document list, browse to the other version of the document.
- Click OK.
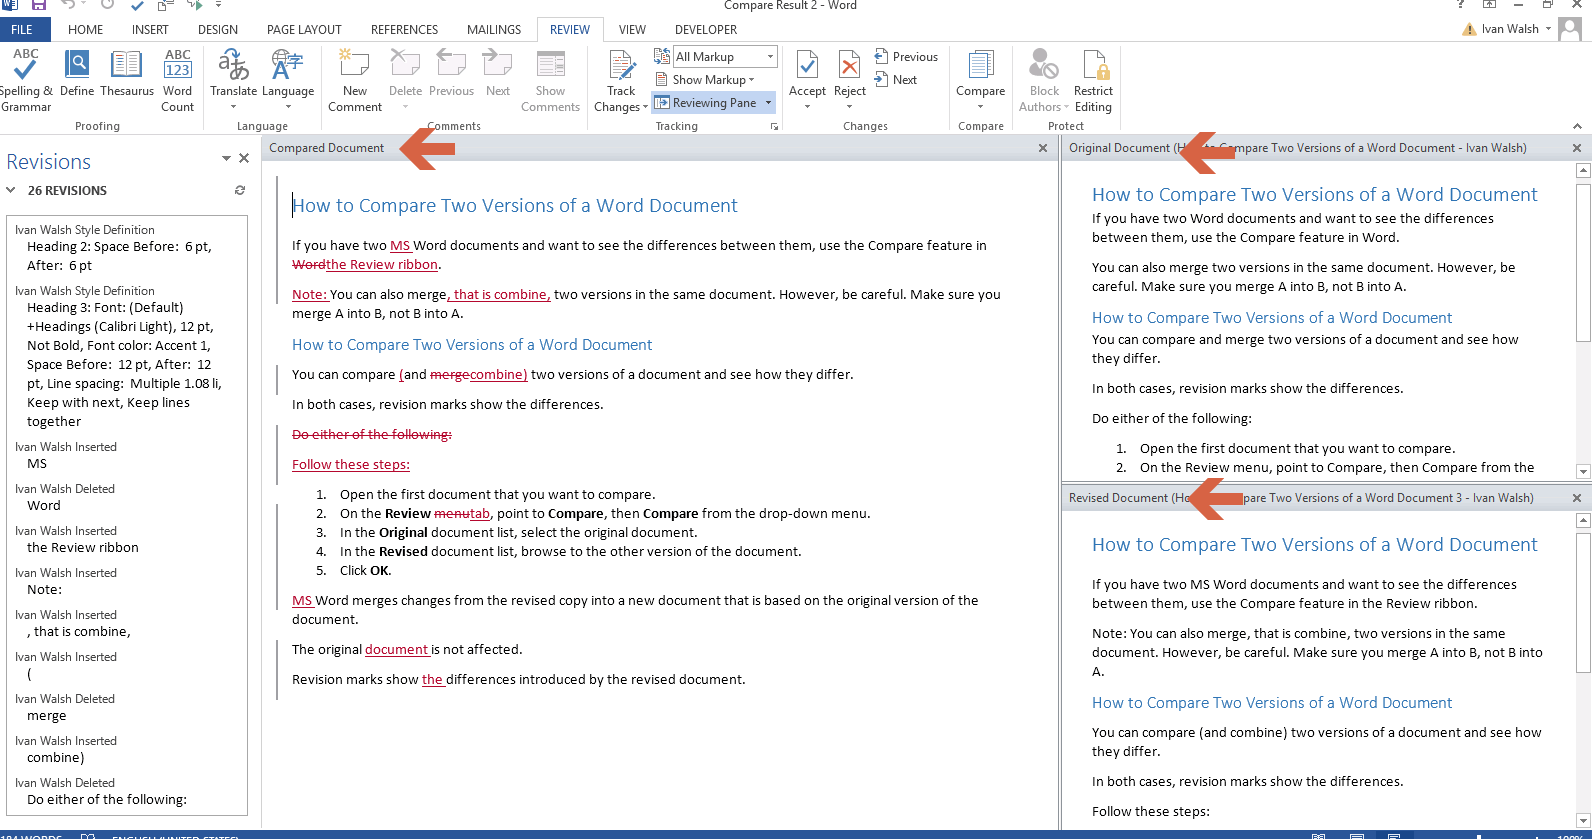
Word merges changes from the revised copy into a new document that is based on the original version of the document.
The original is not affected. Revision marks show differences introduced by the revised document.


